
The Right Foundation
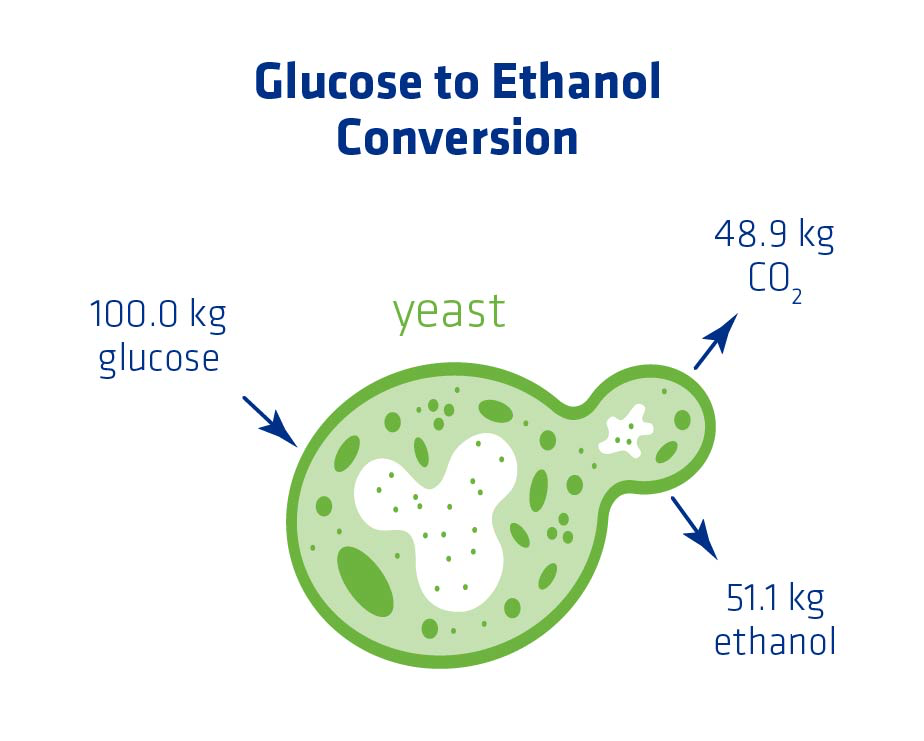
Efficient ethanol production begins with ensuring there’s a sufficient amount of yeast present to start fermentation. The goal of every plant is to convert available glucose into as much ethanol as is theoretically possible (see Figure 1). An adequate yeast population and conditions that support overall yeast health can help to maximize ethanol yield.
The growth of a consistent yeast population can be significantly impacted by quality yeast hydration (if needed) and propagation procedures; these are the right foundation.
Hydration
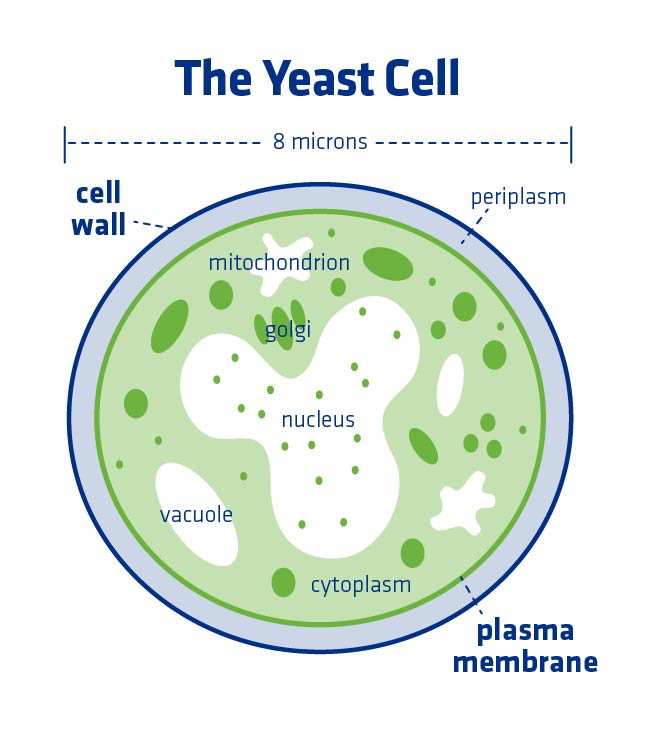
In order to perform a quality hydration, it’s important to first understand basic yeast cell anatomy. A yeast cell has an outer wall that is rigid and structured, made mostly of carbohydrates and proteins.
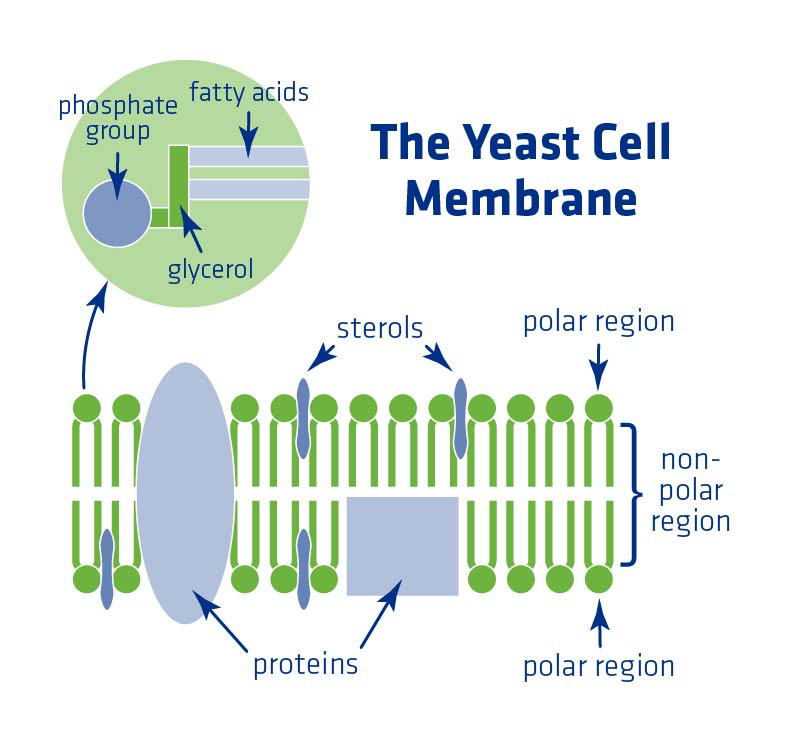
Next is the softer, but still ordered yeast cell membrane comprised of fatty acids and sterols. This membrane performs vital roles, namely:
- Stress protection
- Regulation of material transfer in and out of the cell
- Maintenance of cellular integrity
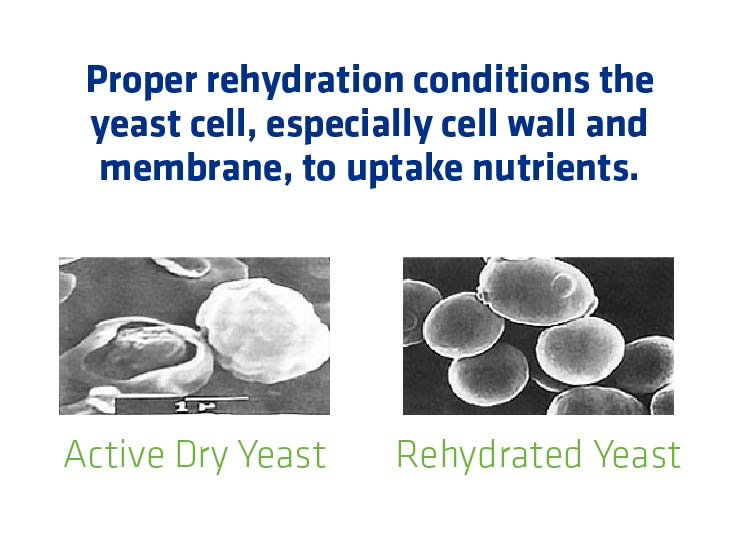
When using active dry yeast (ADY), proper hydration is essential to ensure that the cell wall and membrane can absorb necessary nutrients.
Time, temperature and agitation, affect rehydration:
- Time: Yeast should soak approximately 15-30 minutes, but not so long that they run out of food sources and start to cannibalize their own cells.
- Temperature: Hydrating at a warm temperature, 95-97°, is best for yeast health. Hydrating at a lower temperature (i.e. cold hydration) can damage the yeast, causing cells to stick together, pull apart and tear holes in their cell membranes. No hydration at all is better than cold hydration.
- Agitation: A little bit of agitation ensures that the water reaches the full surface area of the cells and that they don ‘t stick together and clump.
Propagation
Propagation prepares the yeast for fermentation by acclimating the yeast to conditions in the fermenter and grows a sufficient quantity of yeast for fermentation. Without propagation, a large quantity of yeast must be added directly to a fermenter. Much more yeast is needed at the start of a direct pitched fermenter compared to what is added to a propagator.
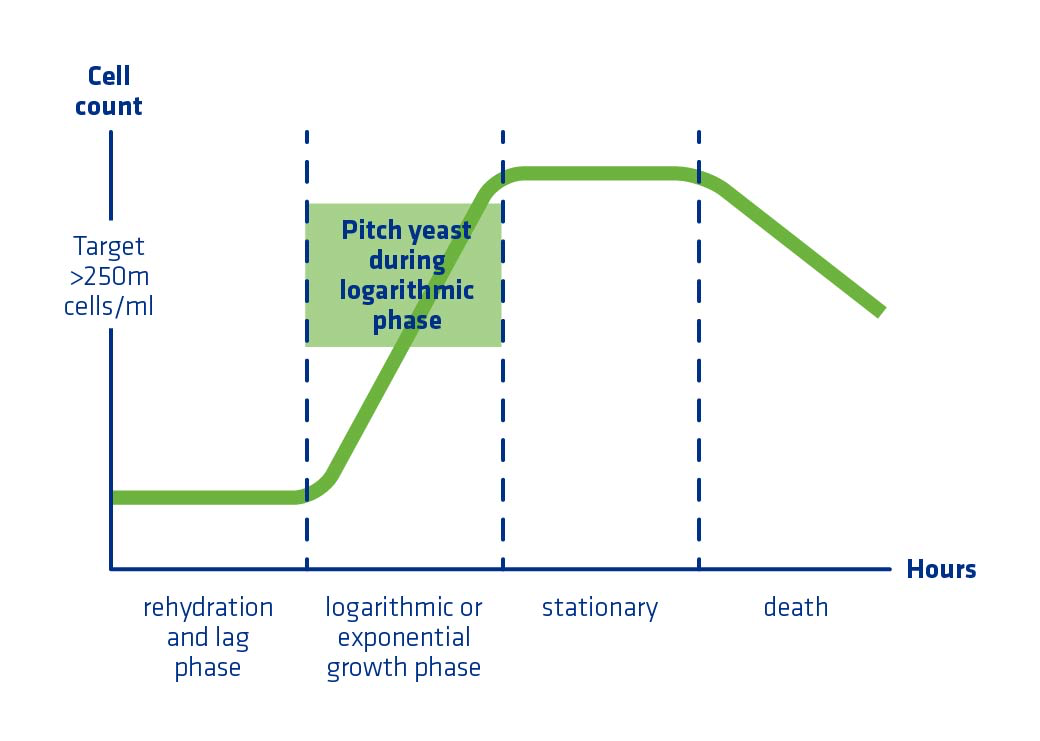
In order to optimize propagation, it’s important understand the four phases of yeast growth (Figure 5), which include:
- Lag
- Log (Exponential Growth)
- Stationary
- Death
Lag Phase
When a new propagator or fermenter is inoculated with yeast, the yeast enters a period of time where they are metabolically active, but not dividing, called lag phase. The yeast cells are adapting to their new environment and uptake nutrients in preparation for cell division. Providing proper nutrition to the yeast culture during this phase will help to minimize its length.
Log (Exponential Growth) Phase
Logarithmic phase begins when the yeast culture has reached the metabolic maturity to begin to use the available nutrients to increase in population and begin to divide. Log phase growth will continue as long as nutrients remain available in sufficient concentrations and the environment does not become too harmful.
Optimizing Propagation
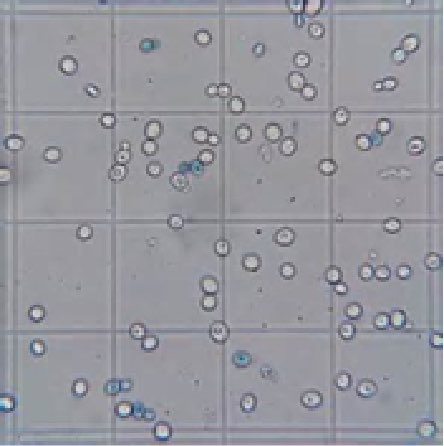
To optimize propagation, yeast should be sent to the fermenter when they are growing aggressively and at a sufficient cell count. A cell count procedure utilizing a hemocytometer and methylene blue dye is used by most plants for quantification of total cells, budding, and viability. Once the methylene blue is added, dead cells are blue but viable cells are clear because the dye is excluded from viable yeast (see Figure 7).
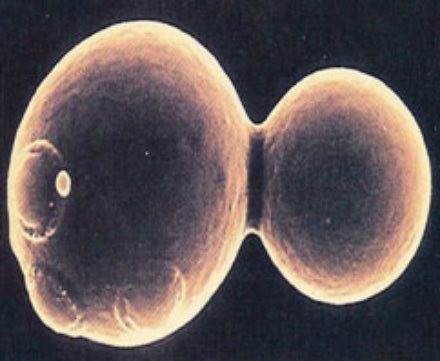
The way to determine the best time to pitch yeast is to monitor budding. A “bud” is considered to be half the size of its mother cell or smaller (counted as 1 live and 1 bud). “Buds ” greater than half of the mother cell are counted as 2 live cells. When budding levels peak in propagation, this is an indicator that the yeast are in log (exponential growth) phase and ready to be sent to fermentation. One of the best ways to determine this timing is by performing a yeast propagator profile.
The critical steps for yeast propagator profiling include:
- Analyze at least three propagator batches in one week so that other process parameters should be relatively similar between each profile.
- The same person should count all of the batches if possible to ensure consistency.
- Propagator samples should be pulled for analysis every hour until prop send.
- Total cells, viability, and budding – every hour
- HPLC – every hour starting at four hrs until prop send
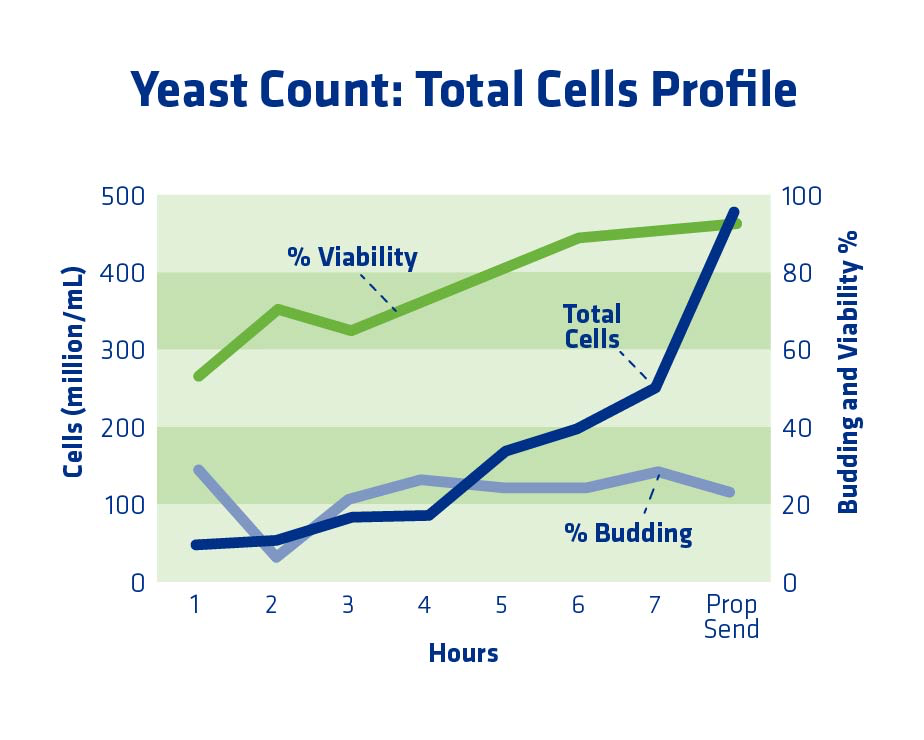
Figure 8 shows an example of a yeast propagator profile when the propagator was held slightly too long. Budding percent had started to decline by the time the yeast were sent to the fermenter. In this scenario, to optimize the propagation, the yeast should have been sent to the fermenter at seven hours, when the cell count was high enough and the budding had peaked. By the 8th hour, budding had dropped slightly, and the yeast was not as active. It had entered the stationary phase.
As a general guideline, plants should make sure to have at least 200 million cells/ml yeast cells at the end of propagation, with the normal range being 250-450 million cells/ml. The exact number will depend on the unique plant and the type of yeast used. In terms of budding, plants should aim for above 25% budding, although greater than 15% is likely sufficient. Another important factor in yeast health and optimized propagation is adequate nitrogen in the form of Free Amino Nitrogen (FAN). Target levels for propagation are >600 ppm. FAN is explained in detail in the “Yeast Health” section.
Stationary Phase
It is difficult to keep any culture in a growth state all the time. In propagation, yeast move into a stationary phase when they are still healthy, but the availability of nutrients is becoming too limited to continue replication. In stationary phase, budding is low and the yeast will produce ethanol much slower than yeast in log phase. If the yeast culture enters stationary phase before being sent to the fermenter, it will enter a new lag phase before beginning log phase growth again. Following stationary phase, the yeast culture will deplete the available nutrition or succumb to stress and decline in health and die.
In summary, when yeast is appropriately hydrated and propagation is optimized, this helps to reduce the natural lag phase that occurs in the fermentor. A short lag phase in fermentation offers many potential benefits, including:
- Suppression of bacterial growth early in fermentation.
- Rapid transition to exponential growth phase and faster start of fermentation.
- Less risk of incomplete fermentation for plants with shorter fermentation times.